

how to wash a car with a pressure washer
Most car owners either avoid pressure washers because they’re afraid of damaging their vehicles or use them without considering the risks. Both approaches can lead to problems. Washing with a bucket and hose takes up valuable time and may still leave dirt in the wheel arches, while using a pressure washer incorrectly can remove wax, loosen trim, and cause swirl marks on the paint.
If you’re new to pressure washing or wondering how to clean your car without damaging its paint, this guide is for you. Removing weeks of accumulated dirt and grime with a high pressure washer can be satisfying. It’s quick, effective, and, when used properly, can leave your car looking almost new.
This guide covers the entire process of pressure washing a car safely, including the proper equipment, washing order, and techniques to achieve a better and faster washes.
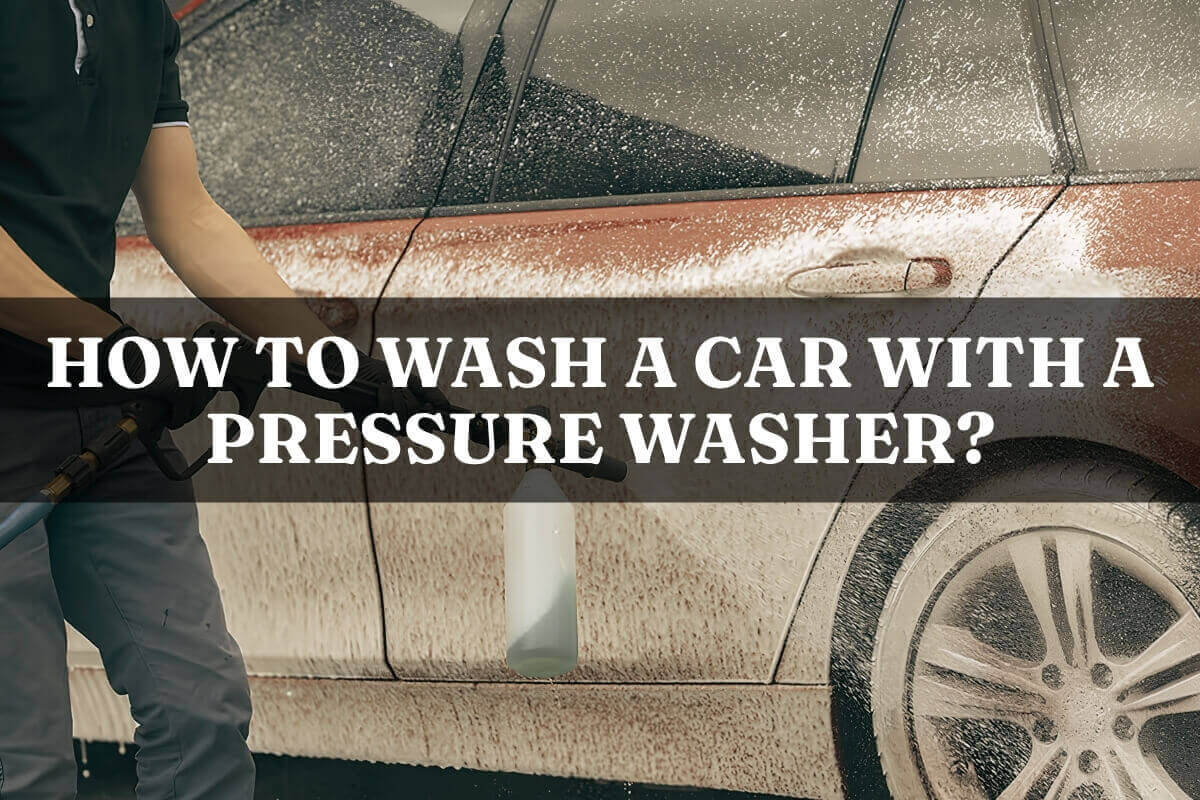
Why should you wash your car regularly?
Whether your car is a collector’s item or your everyday vehicle, regular washing is important. Dirt and debris can accumulate on its exterior throughout the year, from road salt in winter and pollen in spring to bugs in summer and fallen leaves in autumn. If left uncleaned, these materials can eventually damage the paintwork. Regular washing not only restores your car’s shine but also helps preserve its value. Following the right cleaning practices can keep your vehicle looking clean and well-maintained.
Why use a pressure washer for your car?
Traditional hand washing is a common car cleaning method, but pressure washing makes the process quicker, easier, and more effective. It is particularly useful for removing stubborn mud, road salt, and built-up dirt from wheels and undercarriages.
Compared to traditional car washing methods, pressure washing offers several benefits:
- It saves time: Cleaning an entire car can take less than 10 minutes.
- It uses less water: A pressure washer can consume up to 80% less water than a garden hose.
- It provides better access: It helps remove dirt from wheel wells, underbodies, and roof lines without requiring extra effort.
- It cleans more effectively: High pressure helps loosen stubborn dirt that sponges or wash mitts may leave behind.
Essential equipment: Pressure washer and supplies
Choosing the right pressure washer
Gas-powered pressure washers produce higher pressure and are commonly used for commercial cleaning jobs. Electric pressure washers provide more consistent and controllable pressure, start quickly, and require less maintenance. They are also safer for house or enclosed garages because they do not produce the carbon monoxide emissions associated with gas-powered models.
Based on MATCHUP’s experience in developing and testing electric pressure washers, the recommended pressure range for car washing is 1,200 to 1,900 PSI. This provides a suitable balance between cleaning performance and paint protection. Pressure below 1,200 PSI may not be strong enough to remove road grime effectively, while anything above 1,900 PSI can put paint and trim at risk. For better results, pair this pressure range with a flow rate of 1.2 to 1.5 GPM.
Other features to consider when choosing a pressure washer include:
- Hose length: A 10-metre hose is recommended to reduce kinks and pressure fluctuations, for moving around a full-size vehicle comfortably.
- Wand material: Reinforced aluminum or stainless steel wands are more resistant to bending, while low-quality plastic wands may affect spray consistency.
- Trigger lock: A safety lock helps prevent accidental spraying and protects both the user and the vehicle.
Necessary accessories and cleaning agents
A foam cannon is one of the essential accessories for car washing. It combines soap and air to create thick foam that loosens dirt and contaminants before washing, reducing the risk of scratching the paint when removing grime. Most pressure washers also come with interchangeable, color-coded nozzles that produce different spray angles and pressure levels.
The nozzle angle affects how concentrated the water spray is:
- White (40 degrees): The safest and most commonly used option for washing cars.
- Green (25 degrees): Suitable for cleaning tires and undercarriages.
- Black (65 degrees): Designed for applying soap at low pressure.
Other essential car washing supplies include:
- Always use a car wash soap formulated for automotive cleaning.Always use wash soap specifically made for vehicles. Household soaps can strip away protective wax and affect the paint’s finish.
- Two wash buckets, one for soapy water and another for rinsing the wash mitt. Grit guard inserts for trapping dirt and particles at the bottom of each bucket.
- At least two microfiber wash mitts to ensure a clean one is always available. Large, high-GSM (grams per square meter) microfiber drying towels for scratch-free drying.
- A soft-bristled wheel brush for removing brake dust.
- Detailing brushes for cleaning grilles, badges, and narrow panel gaps.
Optional protective products
Drying aids help reduce friction when drying your car, while specially formulated wheel and tire cleaners remove brake dust and rubber browning. Applying a spray sealant every four to six weeks also helps protect the paint from UV exposure and makes future washes easier.
Pre-wash preparation
Step 1. Prepare your car for pressure washing
Before using the pressure washer, rinse your car with a garden hose or use a leaf blower to remove loose leaves, grease, and other debris. This helps reduce the risk of swirl marks during washing.
Step 2. Choose the right washing location
Park your car in a shaded area or wash it during cooler hours to prevent water and soap from drying too quickly and leaving mineral deposits or streaks. Choose a flat surface with a slight slope so dirty water can flow toward the drains instead of collecting around the vehicle. Check the surface temperature by touching the car’s metal panels. If they feel warm, allow them to cool before washing to avoid water spots.
Step 3. Set up your workspace
Remove nearby tools and other objects to prevent hoses from pulling the wand against the car’s body. Make sure the hose is long enough to reach every side of the vehicle without becoming tangled or stretched.
Step 4. Protect your car and surrounding area
Before washing, make sure all windows, doors, and sunroofs are completely closed. Pressure washers can force water into small openings that a regular garden hose may not reach. Remove exterior accessories, such as antennas and magnetic signs, since water pressure can loosen or dislodge them.
Check the paintwork for chips and cracks where pressurized water could lift the clear coat or expose areas to rust. Reduce the pressure when cleaning these sections to avoid further damage. Also, secure any cracked or loose trim before starting to prevent water from entering behind the panels.
Preparing the pressure washer
Connect the water supply
Connect the water supply hose to the pressure washer’s inlet and fully open the tap. With the motor still turned off, squeeze the wand trigger to allow water to flow through the system and remove trapped air. Keep holding the trigger until the water runs steadily without spitting. Once the water flow is consistent, you can start the motor.
Starting the machine while air remains inside the pump can cause cavitation. MATCHUP’s production testing identifies cavitation as a major cause of early pump seal failure in consumer-grade pressure washers. Removing trapped air before starting the motor helps extend the pump’s lifespan.
Select and test the nozzle
Choose a 25-degree or 40-degree nozzle and make sure it is securely attached to the wand. For car washing, start with the white 40-degree nozzle, as it provides a wider and safer spray pattern. Never use a 0-degree and 15-degree nozzle on vehicles because its concentrated pressure can damage the clear coat or scratch metal surfaces.
Before spraying the car, test the nozzle on concrete to check the spray pattern and fan width. Keep the wand moving continuously while washing to prevent concentrated pressure from damaging the vehicle.

Step-by-step guide to wash a car with a pressure washer
Follow these steps to pressure wash your car properly, from the initial rinse to the final drying process.
Step 1. Clean the wheels and tires first
Clean the wheels and tires before washing the rest of the car to prevent dirty water from splashing onto freshly cleaned paint. You can switch to the green 25-degree nozzle for additional cleaning power on tires and wheel wells, but keep at least 12 inches away from the wheels to avoid damaging their finish.
Apply a dedicated wheel cleaner to the rims, lug nuts, and tire sidewalls. Use specialized brushes to remove dirt and brake dust from the wheel barrels and lug nut areas.
Rinse each wheel thoroughly before moving to the next one. Avoid using your regular car wash mitts on the wheels, as accumulated dirt and brake dust can scratch the paint when transferred to other surfaces.
Step 2. Perform an initial high-pressure rinse
Move the wand in smooth, overlapping horizontal passes while keepping the nozzle approximately 1 to 2 feet away from the surface to avoid damaging the paint or loosening exterior trim. Pay particular attention to the lower rocker panels to remove accumulated dirt before it reaches the cleaner upper sections.
Start by rinsing your car from the roof downward, allowing gravity to carry loose dirt and debris toward the ground instead of spreading them across clean paint.
Step 3. Apply snow foam
Follow the manufacturer’s recommended dilution ratio to ensure the foam has the right consistency. Using a foam cannon or black soap nozzle, cover the entire vehicle evenly from top to bottom in one continuous pass. Allow the foam to sit for 3 to 5 minutes so it can loosen and lift dirt from the surface.
Make sure the foam remains wet throughout the process. Do not allow it to dry on the paint, as this can leave residue. If certain areas begin to dry, rinse and reapply the foam as needed.
Step 4. Perform a contact wash using the two-bucket method
Although pressure washers are effective at removing loose dirt and surface contamination, they cannot completely remove bonded traffic film. This grey, greasy layer of exhaust residue and environmental debris sticks to the paint and requires physical cleaning to remove.
Prepare two buckets with grit guards: one containing soapy water and the other filled with clean rinse water. Wash one panel at a time, starting from the roof and working downward. Use straight, overlapping movements to reduce the risk of visible swirl marks. After cleaning each panel, rinse the wash mitt in the clean water bucket before dipping it back into the soapy solution.
Step 5. Perform a final rinse
Use a broad spray pattern with the white 40-degree nozzle to rinse the entire vehicle from top to bottom. Work carefully to remove all remaining soap and loose dirt, as leftover residue can cause streaks.
Pay attention to panel gaps, emblems, mirror housings, window trim, and door jambs where soap can collect. Move slowly over glass surfaces to remove soap film and maintain clear visibility.
Step 6. Inspect the vehicle
After rinsing, walk around the car and check for missed spots, remaining dirt, or soap residue. Rinse any areas that still need attention and repeat the cleaning process where necessary. Make sure the entire vehicle is thoroughly rinsed before moving on to drying.
Step 7. Dry and protect your car
Start drying your car immediately after the final rinse to prevent mineral deposits and water spots from forming. Use a large, soft microfiber drying towel to absorb water. Gently blot or move the towel in straight lines with light pressure to avoid scratching the paint.
You can also use a fresh chamois to remove remaining water. Make sure the car is completely clean before drying, as leftover dirt can scratch the paint when wiped with a towel.
For a touch-free drying option, use a leaf blower or dedicated car dryer to remove water from grilles, wheel spokes, and emblems. However, be careful not to blow dust or debris onto the freshly washed surface. Dry the door jambs and mirror backs last to prevent dripping water from reaching already dried panels.
Tips for better results and faster washes
Getting faster and better results when pressure washing your car requires preparing your equipment in advance, cleaning the vehicle in sections, and applying protective products after drying.
Make the washing process more efficient
Prepare all your car washing equipment and supplies before starting to avoid unnecessary interruptions. Divide the vehicle into sections, such as the roof, hood and trunk, sides, and wheels. Finish cleaning each section before moving to the next. Using a foam cannon also makes washing easier by covering the vehicle with soap in one pass, helping loosen dirt while you prepare for the contact wash.
Improve shine and paint protection
Apply a spray sealant after drying to help protect the paint and maintain its shine. You can also apply wax to maintain the paint’s gloss and provide additional protection.
Reapply wax every month or two to help maintain water beading and prevent dirt from sticking to the surface. Some high-quality waxes can last up to six months or longer. Washing your car every two weeks also helps prevent dirt buildup and maintain its protective coating.
Inspect the vehicle after drying
Check your car under good lighting after drying to identify any remaining streaks or water spots. Look at the paint from different angles, especially the lower panels where dirt and residue can collect. If necessary, use a suitable fallout remover or tar solvent to remove stubborn deposits. Also, inspect door jambs, sills, and seals for trapped water to help prevent staining and rust.
Clean and store your washing equipment properly
Rinse all wash mitts, towels, and brushes immediately after use to prevent soap and dirt from drying on them. Hang them up and allow them to dry completely before storage. Keep wheel-cleaning brushes separate from paint-cleaning tools to avoid transferring dirt and brake dust.
MATCHUP also recommends draining all hoses completely before storing them to prevent mildew and fitting damage. This is an often-overlooked part of maintaining the pressure washer’s pump and seals. Store the machine in a dry location and follow the manufacturer’s winterization instructions when temperatures fall below freezing.
Summary
Effective pressure washer car detailing requires more than spraying water on the exterior than raw power. Learning how to wash a car with a pressure washer, by using the proper pressure, the right nozzle, a safe washing sequence, and careful attention to areas like the engine compartment and underside, you can improve cleaning results while protecting your automobile. Routine maintenance also helps protect the paint, reduce corrosion, and extend the life of important parts. With the right equipment and careful technique, pressure washing is one of the fastest and most effective ways to keep your vehicle clean year-round.
Before your next wash, verify that your equipment is properly set up and your supplies are ready. MATCHUP manufactures pressure washers built for repeated, reliable performance. With direct factory pricing, OEM/ODM capabilities, and dedicated technical support, MATCHUP provides the equipment foundation that makes every wash count.
Frequently asked questions
Is it safe to use a pressure washer to wash a car engine?
Yes, but only when the engine is cool, sensitive electrical components are protected, and low pressure is used.
Should I use warm or cold water?
Cold water works well for routine washing. Warm water can help remove grease, but extremely hot water is usually unnecessary.



May Ge
Outdoor Machinery Export Manager 6-Yr Exp 🌍 ∣ BSCI, EPA, EURO V, CE ∣ Generator, High-pressure Washer, Water Pump, Engine, Floor Scrubber ∣ 🚀 24/7 Second Reply
TAIZHOU BISON MACHINERY CO.,LTD | Ningbo University of Technology
Our related blog

what is the right pressure washer PSI
Confused about pressure washer PSI? Learn how to select the ideal PSI for safe and effective cleaning on any surface. Read on to learn more.

how to pressure wash your home
Ready to refresh your home’s exterior? This complete homeowner’s guide will teach you how to pressure wash your home correctly.

how does a pressure washer work
Have you ever wondered how pressure washers clean so effectively? Learn how they work, why they are so effective, and how they can change how you clean.

electric vs. gas pressure washers
Compare electric and gas pressure washers to determine which one is best suited for your home or commercial cleaning needs. Learn the pros, cons, and uses of each type etc.